Only users with the “Add a requisition” checkbox in the role settings can create and edit requisitions.
Fill in the main information
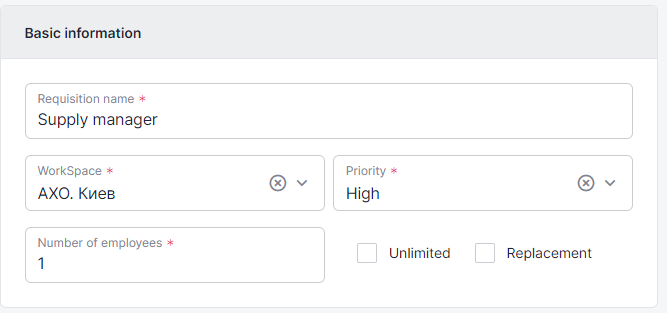
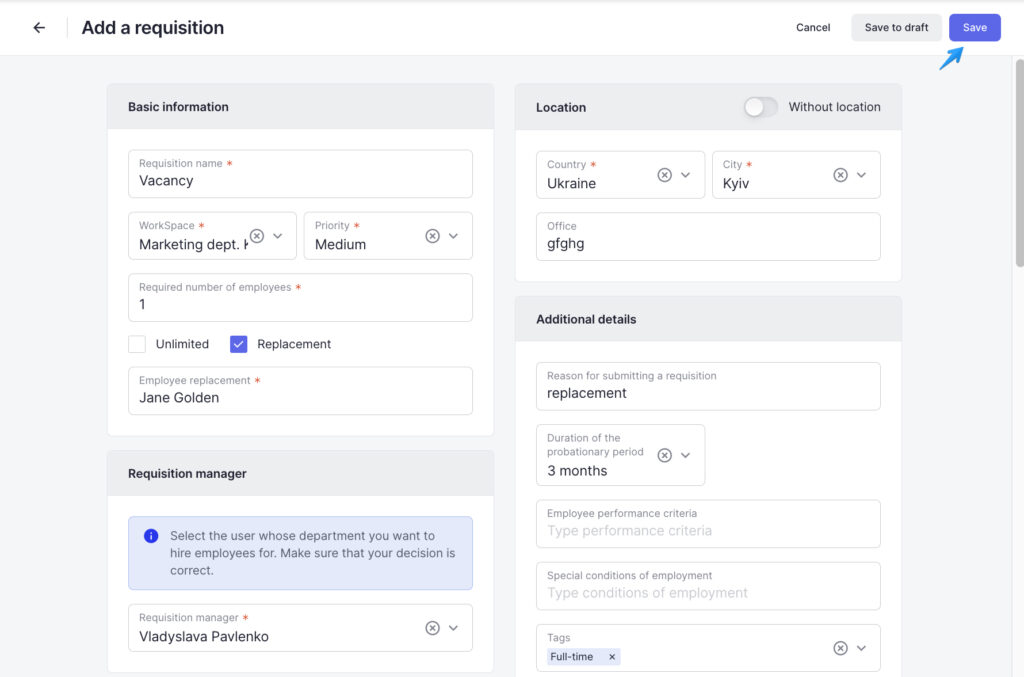
You can create a requisition by clicking on the “Add a requisition” button in the upper right corner of the screen of the “Requisitions” block. You will need to fill out the mandatory fields, such as “Requisition name“, “WorkSpace“, “Priority“, “Requisition manager“, and “Number of employees” as well as some other basic information about the candidate.
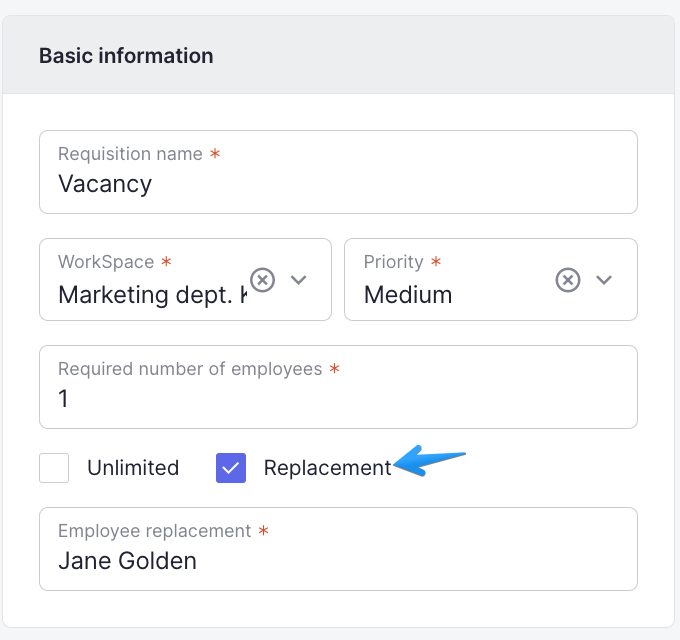
You can set the number of required candidates or choose the “Unlimited” or “Replacement” options.
In the case of the “Replacement” option, you need to mention the number of candidates and the name of the employee to be replaced.
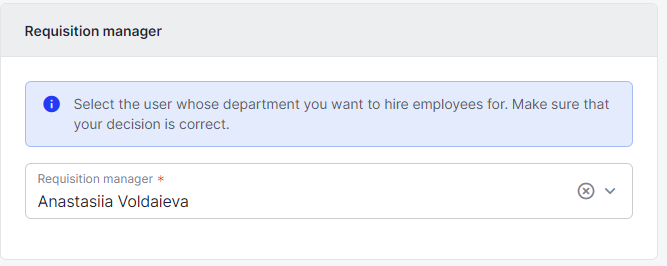
Then, select the requisition manager. Usually, it’s a user whose department you need to hire employees for. If you are creating the requisition for your department, then you should select yourself here.
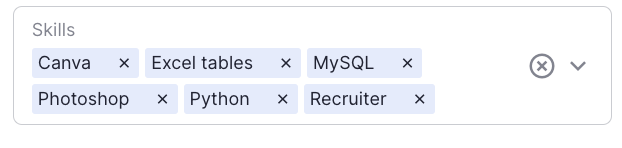
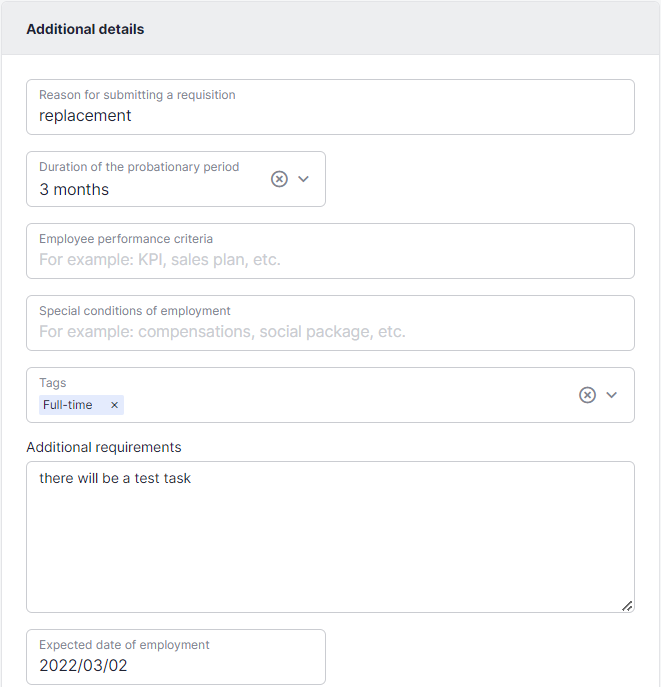
On the next step, fill in the “Terms/Requirements” fields and select the desired tags in the “Skills” field for a more convenient requisition search.
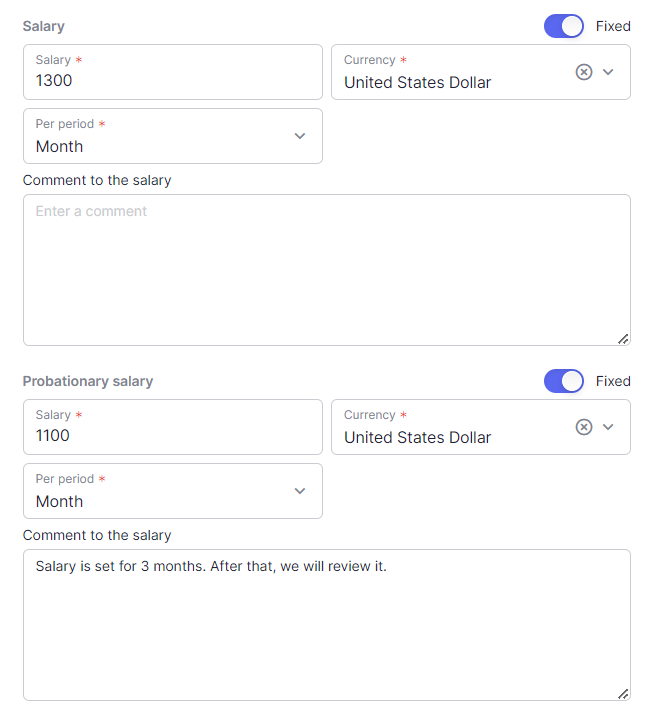
Salary and Probationary Salary fields contain a toggle that is set as fixed by default. You can change it and set the desired salary range (From and To). Apart from that, you can specify information about salary by selecting a period of salary (per hour, month, year) and writing a comment to the salary.
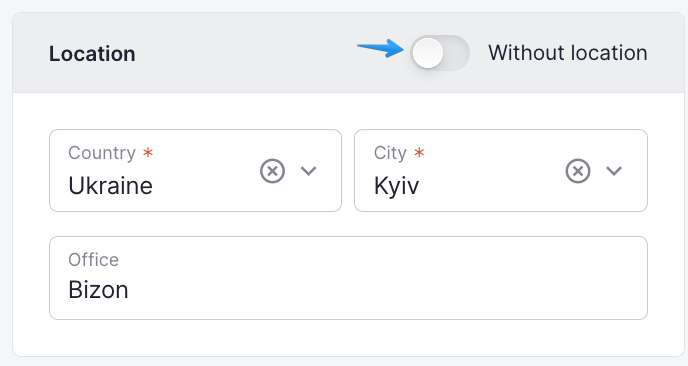
Next, fill in the “Location” block with the office location details. If no location is provided (for instance, remote work) enable the “Without location” toggle.
You can provide additional information that can help the recruiter create a vacancy profile. You can also add files to the requisition, like test tasks, using one of the following formats:
- doc
- docx
- odt
- jpg
- jpeg
If the format of your file is not listed above, please use an online file converter.
On the last step of creating a requisition, which is “The negotiation chain“, you need to specify the users who are responsible and authorized to approve or reject the requisition.

As soon as you fill in all necessary information, click on the “Save” button at the top right to publish the requisition or click on the “Save to Draft” button, so only you can see the draft. The latter allows you to edit or delete your requisitions.
Once the requisition is saved, it will be listed in the general list of the “Requisitions” block.
Time limit
2 days – for negotiating a requisition
5 days – for taking requisition into work
If the time limit is overdue, the timer icon becomes red and users responsible for the aforementioned actions receive corrresponding notifications in the system and mail.
