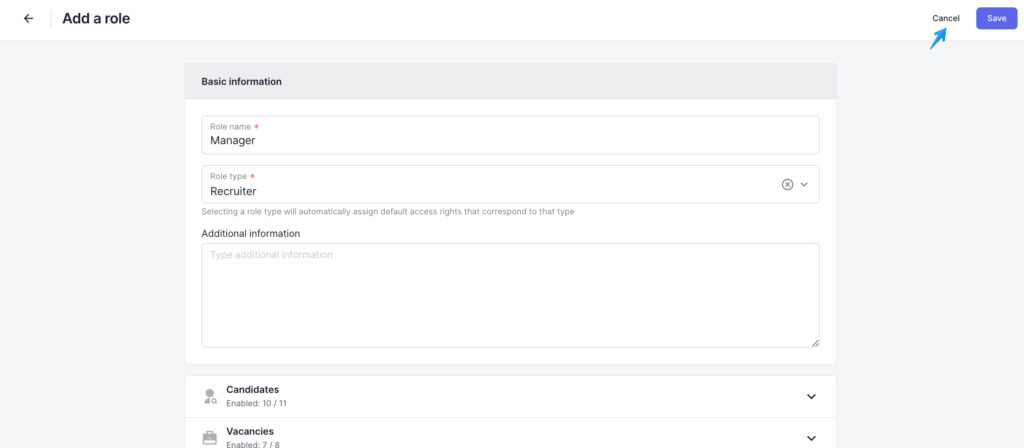
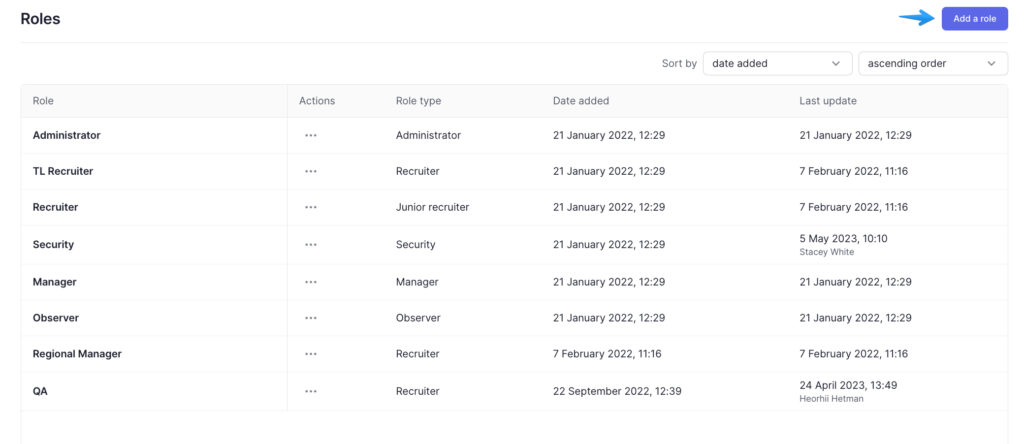
You can create new roles. To do this, go to the list of roles and click on the blue “Add a role” button in the upper right corner of the screen.
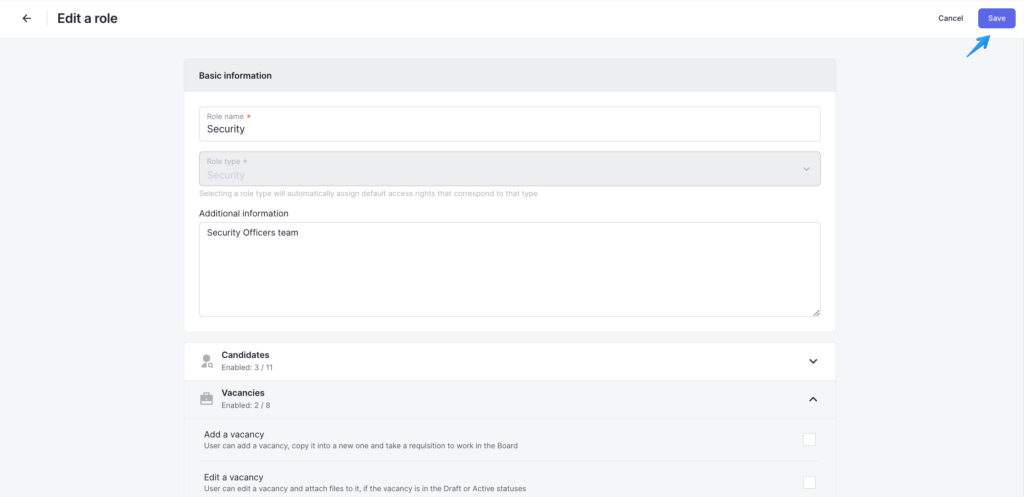
On the page that opens, you need to fill in the Basic information about the role: Role name, Role type, and optionally, Additional information.
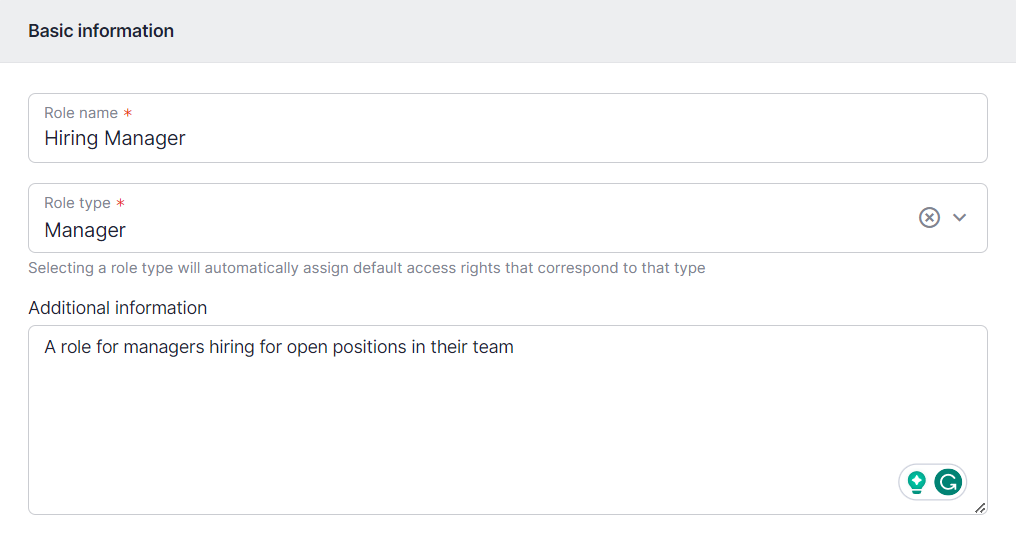
The system has the following types of roles:
- Administrator – for creating roles with maximum access rights (including automatic access to all companies and workspaces)
- Recruiter – for creating recruiter roles with increased access rights (for example, Team Lead Recruiter, HRD, HR Coordinator)
- Junior Recruiter – for creating basic recruiter roles (Recruiter, Researcher, Sourcer, etc.)
- Security – for creating security roles
- Manager – for creating roles of hiring team managers (Manager, Team Leader)
- Observer – to create various roles with minimum access rights (Accountant, Coach, Marketing Manager, HR analyst)
Depending on the type you selected, the appropriate default access settings will be automatically applied to the role you created, but you can change them manually. To do this, scroll down the page to the access settings.
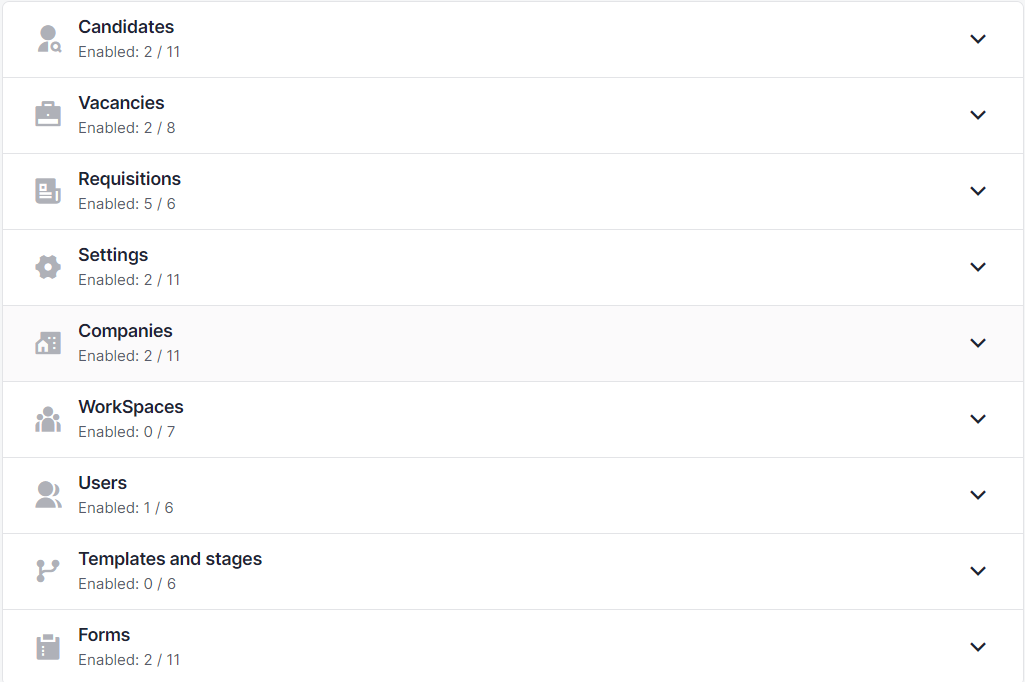
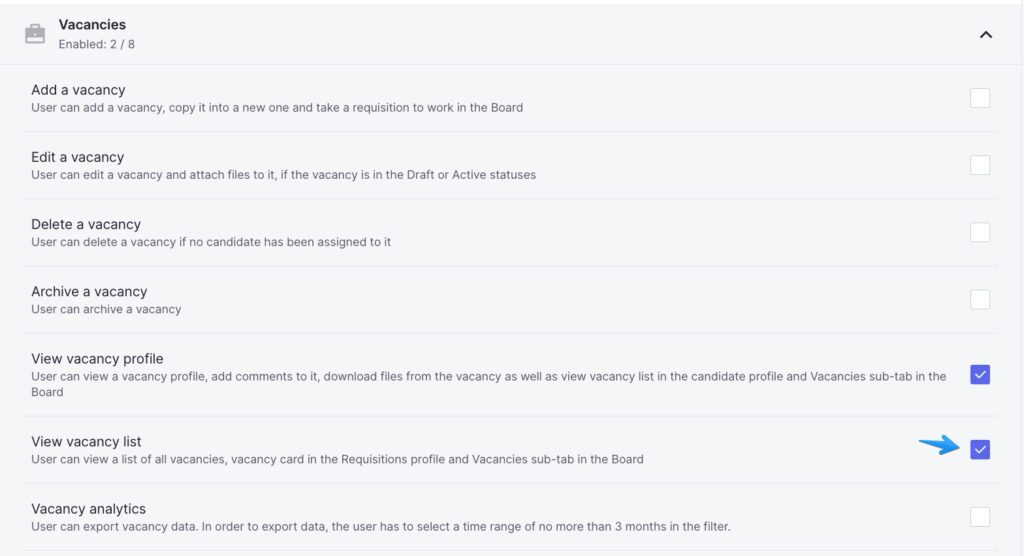
All settings are divided into tabs named after objects – Candidates, Vacancies, Requisitions, Settings, Companies, etc.
To expand a tab, click the Maximize icon to the right of the tab name.

In the unfolded tab, you’ll see fields with action names and a description of what the access settings for a particular action allow you to do. Some fields will already be checked according to the selected role type. To add or remove access rights to a particular action, select or clear the checkbox next to the corresponding field.
After you have configured all the necessary access rights, click the Save button in the upper right corner of the screen to add the role.
If you want to cancel saving the new role, click the Cancel button.